Wednesday 8 August 2012

0 Gyazo, for those who take lots of screenshots


Today I'm going to introduce you to Gyazo, the fastest screenshot capturing and uploading software.


Those who take lots of screenshots would know, it has always been lots of work to take the screenshot, then copy it to Paint, then save it, and then upload it to some place so you can link it. Well, those days are over with Gyazo. All you have to do is download the Gyazo software here.

After you download it, just run it, and it will let you select the space you want to capture on your screen.


After you select the space, wait a few seconds and your screenshot will be ready. Your link will be generated in your favourite browser and then you can link it to wherever or whoever you want to!

You can also view your screenshot history in the website provided that you didn't delete your cache. If you want to be able to check your screenshots on other computers as well, you can sign up for Gyazo Pro. It's only 2$ a month and I think it's well worth it. That way, you can keep your screenshots forever, and you can see them wherever you go.

Tuesday 7 August 2012

0 Faxzero, send fax messages from your computer in an easy way

Many times I needed to send an urgent fax to somewhere, it always ended up with my fax machine not operating properly or me not finding a fax machine at the location I am at all. For all those who are experiencing the same problem, Faxzero is the cure.

All you have to do is to go to Faxzero website, fill in the information, attach the files you want to fax, and you're done. Also, it's free unless you are planning to send too many faxes, so it's a great solution if you need to fax a one page document or something in that fashion.


If you're planning to send more pages, Faxzero offers you to send 15 pages of fax for 1.99$.

Personally, I find this tool very useful since I tend to end up in situations where e-mail is not accepted, but only fax is. Even though fax is sort of an old technology now, it's still being used in many businesses.

Monday 6 August 2012

0 Flux, an interesting piece of software.

Flux (or f.lux) is a software which changes the color of your screen according to the time in the location you are. That way, your screen doesn't look abruptly bright when it's night time.

I personally thought it's really interesting since I actually started to like that the colors aren't as bright as they are in the morning when it's night time. This way, it doesn't feel like someone is holding a flashlight right on my face when I get back on my computer at night time.

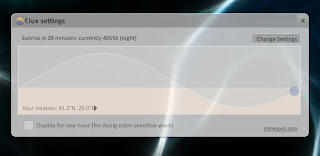
Flux software main window

By clicking Change Settings, you can change your location so that f.lux adjusts itself to change the color when it's the right time. You can also change the intensity of the color for both day and night time in the way you like it to be. Once you get used to how you look at your screen with f.lux at night, try closing it and seeing the difference. Personally, I feel like I'm going blind when I turn f.lux off after using it for a few days now.

Flux software configuration

Graphic designers, don't be afraid of using this software thinking that your colors will be off when the f.lux filter is gone, since you can disable f.lux for one hour with a simple click, and get the colors back to normal for the time you are working on your project.

All in all, it's a pretty interesting and a fun software that everyone should give a try. It's available for Windows, Mac, Linux and iPhone/iPad at the moment. You can download f.lux here.

Sunday 5 August 2012

0 Speeding your Windows 7 boot time up!

Tired of waiting years every time you start your Windows 7 up? You hate restarting your computer just because it takes so long to start it back every time? Well then, this post is for you!

As a person who hates long boot times, I decided to write about how you can speed your Windows 7 up today, let's go!

1) Configure your Windows 7 to use all cores. 

To do this, hit WinKey + R, and type msconfig in the box which comes up. Switch to the Boot tab, select your Windows 7 installation and click Advanced Options. Check Number of processors and max it out.
You can aslo check "No GUI boot" option as it slows down the boot time around 2-3 seconds. (No more colorful Windows 7 boot though.)


2) Eliminate unecessary executables from your Startup.

To do this, open up msconfig like you did at the last step, and pick the Startup tab this time. Check off everything that you don't want to start when your computer does. You can open them up manually when you need to use them. This will save you a lot of time when your Windows is loading up after you log in your user.


3) Eliminate unnecessary Services from your Startup.

The drill is the same as you might've though, just go to msconfig and select the Services tab this time. If you aren't so familiar with your operating system, I suggest checking Hide all Microsoft services before you disabling stuff as you can screw something up in your system.


4) Remove the fonts you aren't using.

Especially if you downloaded lots of Fonts back in the day for some reason, and you aren't using them at all, go to Control Panel -> Fonts and delete the fonts you don't need as Windows loads every single Font when you start it up. This is a tip which will save you a lot of time as well.


5) Disk Cleanup, Disk Scan, Disk Defragment

It's always good to keep your system hard drive tidy and clear since you'll be saving it from extra load by doing that. Go to Computer, right click your system hard drive, click Properties. In the Tools section, start with Error-checking. Check both options and start it off. After that, go to General and hit Disk Cleanup, get rid of the unused files. Lastly, go back to Tools and defragment. Defragment is the most effective tool among these 3 since it will cluster your files, opening up more space in your hard drive and giving you some extra speed.


These are all the things you can do without getting into any sort of hassle and without altering the way you use your Windows. There are a few extra things you can do if you think it's worth it, but I really think there's no need for the extras as what I listed above will be sufficient.

For the ones who want to take look at the extras:

0) Disable Windows Aero. (It's definitely not worth it to disable a feature like this just to gain a few seconds of time in my opinion!)
1) Add up more RAM. Adding RAM will increase your boot time if you don't have sufficient RAM at the moment.
2) Get a SSD. A SSD will perform better than any 7200 RPM hard drive or a 15K SCSI.
3) Delete/switch your Anti-Virus software if you think this is the cause you are having a slow boot. (Some Anti-Virus softwares take too long to load up etc.)
4) Go to BIOS and enable Quick Boot, also assign your hard drive as the First Boot Device instead of an Optical Drive, it will make you gain an extra 3-5 seconds.

All being said, these are the things you can do to speed your boot time up. From minimal tweaks to hardware changes, there are many things you can do to have a quicker boot. I hope you enjoyed the read!

Saturday 4 August 2012

0 RealVNC, a multi-platform remote access software

RealVNC, a multi-platform software which allows you to access computers anywhere in the world, given that they have VNC server installed and configured. It's a great tool for people who want to access their home computers from work or vice versa, or for people who need to administer different computers in the network in a workplace.

Setting up RealVNC is -really- simple. Download it here to start with.

In the setup, check VNC Server for the computers you want to be connected to, and VNC Viewer for the computers you want to connect from. (You can leave it as default, it would be just fine.)

After you install the software, you'll see a box popping up with the needed details to connect.


As we see in the picture, the IP we need to connect to this computer is 192.168.1.5 (given that we are in the same network of course) Now you can go to the other computer, run VNC Viewer, and put the IP address in.

After we put our IP address in, we can click Connect. This will bring up another window which will want us to type the Windows login username and password for the computer we are connecting to. (You can change this option in VNC Server options by right clicking the icon in the start menu, going to Options, and changing the Authentication mode to VNC password instead of Windows password, that way, you can choose a password that you are willing to use. (It's the only option in Free version.))


After you click OK, you will see the other computer's screen on your screen!


That means the connection is successful and you managed to get RealVNC work! This was easy of course, since everything was pretty much set up by itself. The case is different if you are willing to use RealVNC and you aren't on the same network with the other computers.

In this case, you are supposed to open the port 5900 (You can change this in options, but it's not really necessary unless you have something else running on that port) on your router first. If you don't know how to open the port on your router and forward it, I suggest you to go here, choose your router, and choose RealVNC. The steps are pretty simple and straight forward to follow.

After you do that, type the external IP (Learn it here!) of the computer you want to connect to into your VNC Viewer, and you are good to go! 


The free version of the software is limited for personal use, and it only allows you to remote control other computers. I believe file transfer was a tool which should have been included in the Free version as well, and I find a little illogical that it isn't, but oh well!

If you are looking to use this software in a commercial basis, you can try the Personal version and Buy it if you want to, which has advantages over the Free version such as chatting with the other computer, sharing printer, transfering files, 128-bit AES encryption and a higher performance rate.

There's also an Enterprise version which is for large workplaces. It comes with a deployment tool which allows you to install VNC Server from a central computer to the every computer in the network. It also comes with a 256-bit AES encryption compared to the Personal version's 128-bit.

RealVNC lets you try any of these versions for 30 days, so you can have full information on everything about this software before buying it. I personally recommend it as it is the best VNC software I've used compared to the other ones. Of course it comes with the downside of being have to pay for most of the extra features, but I believe it's worth it.


Friday 3 August 2012

0 CPU-Z & GPU-Z, CPU and graphics card overview software

CPU-Z and GPU-Z, two tools that every computer user should have no matter what since they give you a full overview of your CPU and GPU together. From clocks to temperature, these softwares give you every piece of information you need to know. CPU-Z also gives you the full information about your RAM if you ever need it.

CPU-Z and GPU-Z main window


Putting daily usage aside, they are great tools for overclockers since you can verify your data by checking the clock speeds on these softwares.

There isn't really much to say about these softwares as they are pretty straight forward, and they don't really give you the option of doing anything else other than showing you everything what's happening in your computer. (Be happy with that much!)

Maybe it's useless to mention this, but I have to say, these softwares take nearly no space at all as well, so you can feel free to install them on any computer you'd like to, you won't regret it.

I personally use both of these tools for years and I believe it's always handy to have small tools like this in your computer, so you can look up what's happening any time you want.

Click to download : GPU-Z | CPU-Z

Wednesday 1 August 2012

2 GeForce GTX 690 vs. GeForce GTX 680 SLI

In one corner, the fastest single GPU card in the markets at the moment which is priced 500$, and in the other corner, nVidia's dual GK104 core GTX 690, priced 1000$.

nVidia GTX 690 and GTX 680


It's the same price to buy either a 690, or a 680 SLI, but let's see which one performs better.

GTX 690 vs GTX 680 Chart

In the chart, we can see that GTX 690 is basically two GTX 680's on the same card. The core of 680 is doubled and placed on the 690. The only little difference between these two cards is that 690 has a higher GPU frequency as we can see above. Though, it's less power consuming to run a 690 than 680 SLI since 690 consumes a maximum of 300W power whereas 680 consumes 195W. Running SLI also means you'll need more cooling than running a single 690.

All being said, it's time to compare the performances of these cards. (Benchmarks taken from legitreviews.com)


As we see in the benchmarks, 680 SLI and 690 are very close to each other in every single one. It's no surprise to be honest, since both of the setups share nearly the exact values when we look at the charts. The difference between them isn't even close to be noticeable in a daily scenario. 

That being the case, I believe it would be more logical to buy a 690, since it's more open to upgrade when you have the money, (SLI 690) it's easy to cool, and it takes up less power. Even though the 680 SLI came in front in most of the benchmarks, we can see that the difference varies from 0.1 to 2 FPS maximum. Considering the advantages you get from buying a 690 compared to 680's small performance advantage, the good choice would be to buy a 690, especially if you are considering high resolutions. (2560x1600)

All in all, choosing either 680 SLI or 690 won't really make a difference at all, but you'd be saving some power and making an investment for the future by buying the 690.
 

Computer Repository 2012 |- Template created by O Pregador - |- Powered by Blogger Templates