Showing posts with label mac. Show all posts

Wednesday 15 August 2012

0 Printing documents via wireless with your iOS device

Hello! Today, I'll tell you how you can print documents with your iOS device wirelessly. There are two methods to do this depending on your printer, (if it supports AirPrint or not) and we will be talking about both of them, so don't worry.

ipad printer


First of all, let's check if our printer is AirPrint supported by going to Apple Support here. If your printer is in the list, then what you have to do is fairly easy. All you have to do is to connect your iOS device and the computer which is connected to the printer on the same wireless network. After that, simply browse to the document you want to print, tap the Print button, select the printer in the list and print your document!

ios printer menu

If your printer isn't AirPrint compatible, then it will take a bit longer to set it up, but it works either way. Download FingerPrint here. (both for Windows and Mac) Install the software and run it. The software has a free trial but it leaves a watermark on the printed documents so if you want to get rid of the watermark, just buy the license (20$), it's totally worth it rather than buying a new printer.

Next thing, you're supposed to check your printer in the list. That way, FingerPrint will let the printer be recognized by iOS devices in the network.

fingerprint airprint software


Rest is pretty straight forward, keep your computer and FingerPrint running, connect your iOS device and your computer to the same network, tap the print button, choose the printer you want to use and print! Note the speed depends on your wireless connection, so if the connection is unstable it might cause interruptions or slow printing.

Now you have everything set up, you can print whatever you want from your iOS device. You can print your Notes, a Safari page that you might be interested in, your photos, the screenshots you took, your iWork files and many more!

I hope you found this useful and enjoyable!


Sunday 12 August 2012

0 Elgato Video Capture, Copy your VHS tapes to your computer

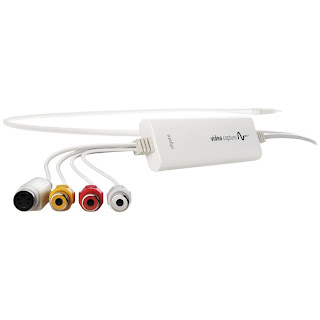
Hello! Today I'll be talking about something that I never thought would be possible, and was quite surprised when I saw the tool on the internet. Basically, it's a VCR to USB adapter which allows you to record the videos on the VHS tape to your computer.

elgato video capture adapter
This small tool here, which allows you to connect your VCR to your computer, also comes with a software for the recording process that I talked about. The adapter is compatible for Mac and PC, and it comes with a price of 75$, which I think is fairly good if you are willing to record some nostalgic tapes that you don't even have the opportunity to see anymore. (I doubt anyone has their VCRs hooked up nowadays) You can check the adapter out @ Amazon here.

elgato video capture screenshot

The process for recording the video from VHS to computer is rather simple. All you have to do is hook the VCR with the computer using the adapter, install the software on your computer and run it, and turn your VCR on. After that, simply go through the software and check if the video/audio is okay, and if it is, press the Start Recording button. Note that the video will be 'recorded', not 'saved', so however long the video you want to record is, you have to leave the software open for that long and wait until it's recorded. After you're done, hit the stop recording button and the software will allow you to trim the parts you don't want to have.

elgato video capture recording


After the recording part is done, you can save the file as mp4 (iTunes ready, you can copy your video over to your iPhone or somewhere similar) to anywhere, and also upload it to YouTube by using the software if you wish. Congratulations, you just got the video on a VHS tape on your computer!

I hope you enjoyed the read!

Monday 6 August 2012

0 Flux, an interesting piece of software.

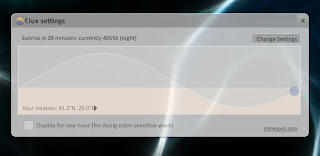
Flux (or f.lux) is a software which changes the color of your screen according to the time in the location you are. That way, your screen doesn't look abruptly bright when it's night time.

I personally thought it's really interesting since I actually started to like that the colors aren't as bright as they are in the morning when it's night time. This way, it doesn't feel like someone is holding a flashlight right on my face when I get back on my computer at night time.

Flux software main window

By clicking Change Settings, you can change your location so that f.lux adjusts itself to change the color when it's the right time. You can also change the intensity of the color for both day and night time in the way you like it to be. Once you get used to how you look at your screen with f.lux at night, try closing it and seeing the difference. Personally, I feel like I'm going blind when I turn f.lux off after using it for a few days now.

Flux software configuration

Graphic designers, don't be afraid of using this software thinking that your colors will be off when the f.lux filter is gone, since you can disable f.lux for one hour with a simple click, and get the colors back to normal for the time you are working on your project.

All in all, it's a pretty interesting and a fun software that everyone should give a try. It's available for Windows, Mac, Linux and iPhone/iPad at the moment. You can download f.lux here.


Computer Repository 2012 |- Template created by O Pregador - |- Powered by Blogger Templates